If the zip archive extension is not enabled or installed then it gives 500 Internal Server Error message on shared hosting.
To solve out this problem I have created a list of some steps.
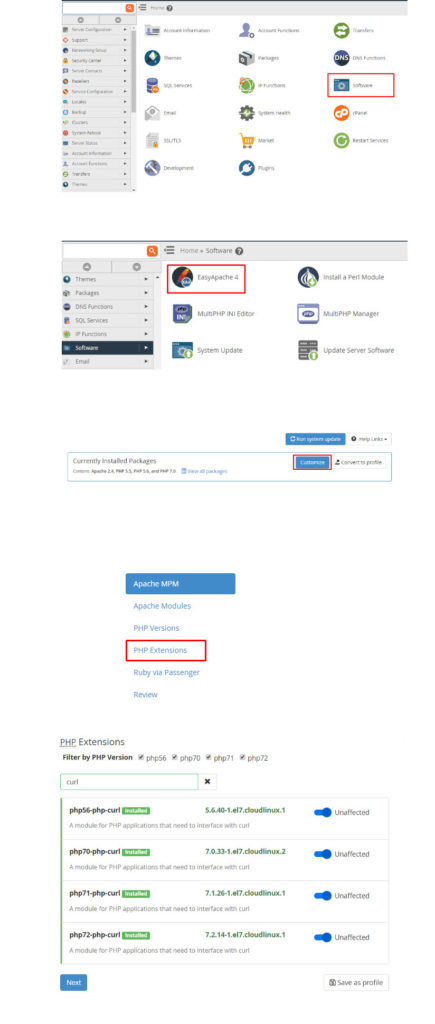
Step 1 : Log in to your Cpanel Account
Step 2 : After login, search PHP pear packages
Step 3 : On a search box, type zip and search
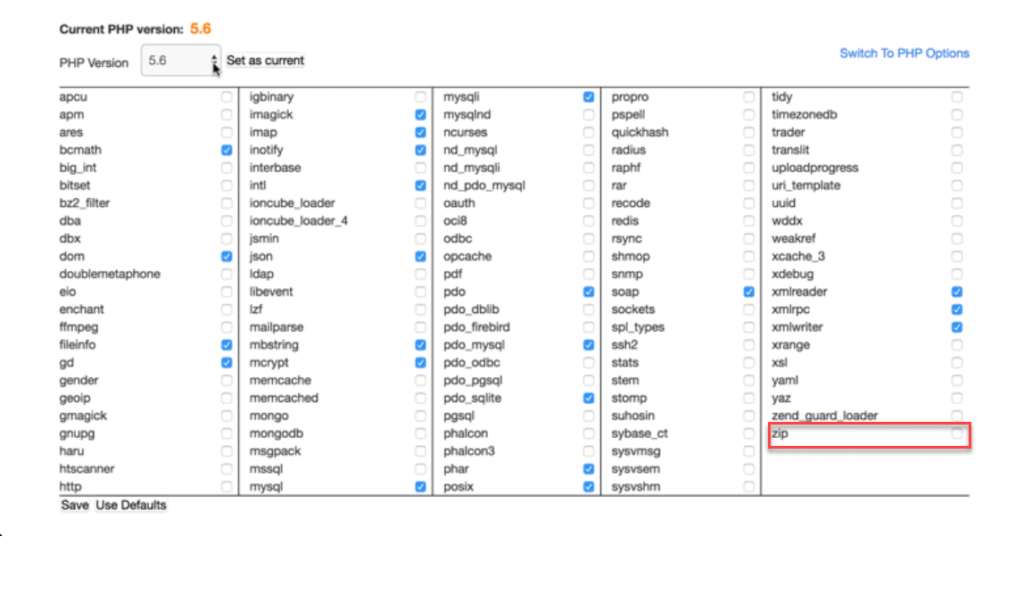
Step 4 : It will give you module name zip
Step 5 : Now you have to click on Install
Step 6 : Now try installing the demo contents using the same method and the demo content install will work fine.
We have tested our theme in most standard hosting setups. Anyhow, make sure your hosting server matches the following requirements.
- Latest version of WordPress 5.3 or higher installed,
- PHP5 or higher and MySQL 5 or higher,
- We recommend to enable mod_rewrite module (If not enabled sometimes pages or posts will result in bad gateway error),
Hosting is more secure when PHP applications, like WordPress, are running using your account’s username instead of the server’s default shared username (www or www-data). The most common way for hosting companies to do this is using PHP. Just ask your potential host if they run PHP or something similar.
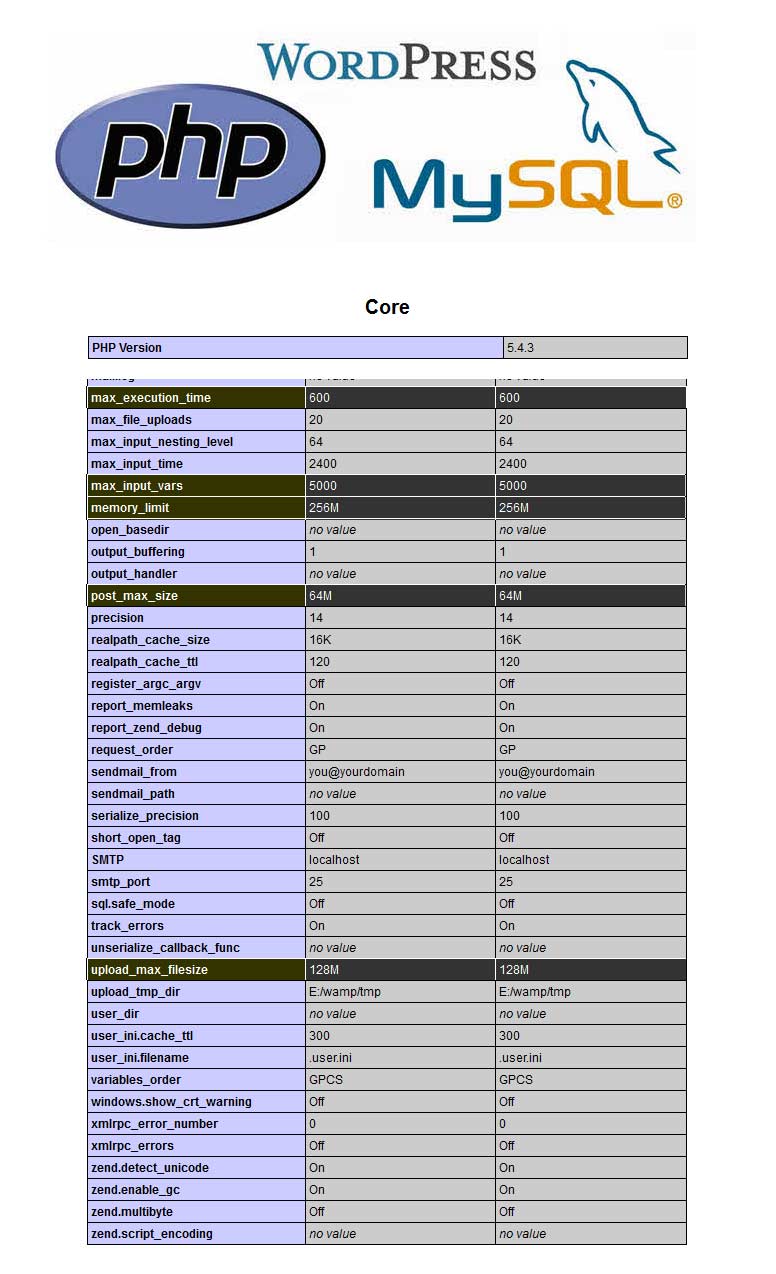
Recommended PHP Configuration Limits
Many issues that you may run into such as: white screen, demo content fails when importing, empty page content and other similar issues are all related to low PHP configuration limits. The solution is to increase the PHP limits. You can do this on your own, or contact your web host and ask them to increase those limits to a minimum as follows:
- Maximum Execution Time (max_execution_time) should be atleast 600 ( max_execution_time 600)
- Maximum Input Vars (max_input_vars) should be atleast 5000( max_input_vars 5000 )
- Memory Limit (memory_limit) should be atleast 256MB ( memory_limit 256M)
- Post Maximum Size (post_max_size) should be atleast 64MB ( post_max_size 64M )
- Upload Maximum file size (upload_max_filesize) should be atleast 128MB (upload_max_filesize 128M)
How to Install cURL in cPanel
Client URL, or cURL, is a computer client that allows users to get files from a server that utilizes FTP, HTTP, HTTPS and GOPHER protocols.
It was written in the PHP programming language. Installing it in cPanel is quite simple, despite appearing confusing to new computer users.
Step 1 : Log into your cPanel account by typing YOURDOMAIN.com/cpanel, replacing “YOURDOMAIN” with the actual domain you own.
Step 2 : Select the “WHM” or “Web Host Manager” icon from the displayed panel and then click “Main” then “Software” and then “Apache Update.”
Step 3 : Click on the “Start customizing based on profile” option and wait for the next screen to appear.
Step 4 : Choose the “Apache Version” from the list of options and press the “Next” button. Continue by clicking the “PHP Major” option and then click “Next” again. On the next screen choose the “PHP Minor” option and press “Next” one more time.
Step 5 : Click the “Exhaustive Options List” from the next “Short Options List” that appears. Select the “cURL” option to install cURL on your server.
Step 6 : Press the “Save & Build” button to start the compilation process and wait for cURL to fully install.